Track Content Tab
Add, edit, and track content currently in production on the Track Content tab. The Track Content tab allows you to track asset creation and customer engagement steps, forecast asset completion dates, send email alerts to task assignees, and track asset creation budgets.
- After performing a search and viewing the results found on the Customers tab, click Edit to update any information found on a particular customer record.
- Navigate to your desired section within the Track Content tab:
Tracked Asset
Select your desired Tracked Asset using the drop-down menu. Any tracked assets a particular customer uses will be available here.
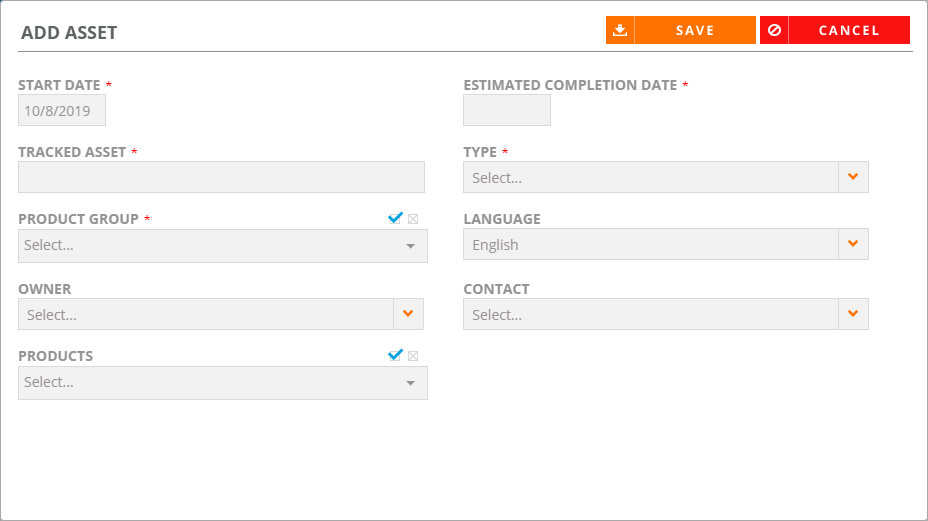
- Click Create.
- Add your asset details. Fields marked with an asterisk are required.
- Start Date: Enter the start date for your tracked asset. Start Date will default to today's date.
- Tracked Asset: Enter a name for your tracked asset.
- Product Group: Select the product groups to which your tracked asset belongs. Click the blue check icon to select all check boxes. Click the X icon to clear all check boxes.
- Owner: Select the owner of your tracked asset.
- Products: Select the tracked asset products. Click the blue check icon to select all check boxes. Click the X icon to clear all check boxes.
- Estimated Completion Date: If "Number of Days to Complete this Step" setting for the selected Type is configured, this date will be calculated automatically. If the "Number of Days to Complete this Step" setting had not been configured, the Estimated Completion Date will automatically default to the Start Date. This calculated field can be overridden by manually selecting the expected completion date of your tracked asset.
- Type: Select the type of unmanaged asset your tracked asset contains. For more information on adding unmanaged assets, see Adding Collateral.
- Language: Select your tracked asset's language.
- Contact: Select the contact of your tracked asset.
Tip: Leave the Estimated Completion Date field for last. If the Estimated Completion Date is defaulting to the Start Date, this indicates that the "Number of Days to Complete this Step" setting has not been configured and should contact support to update your Type calculation and workflow.
- Click Save.
Note: If the desired asset is already in production, skip adding asset information.
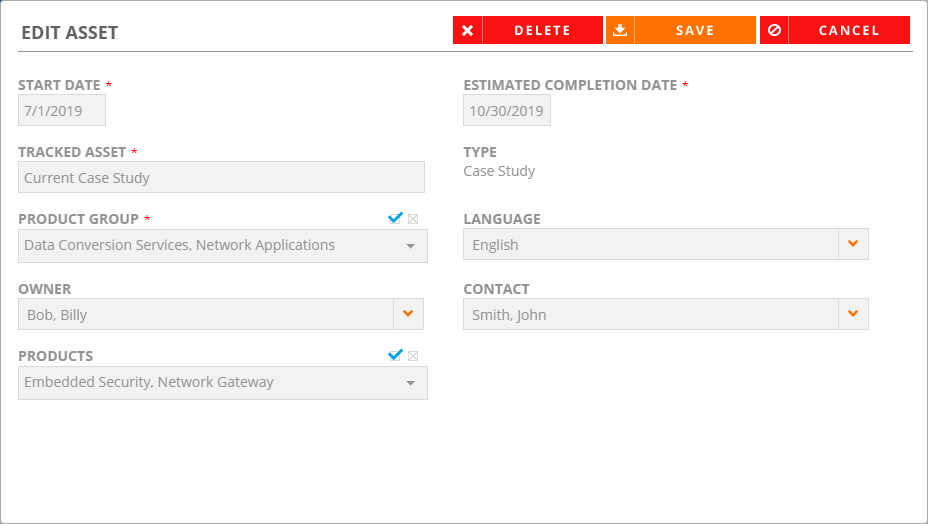
- Click Edit.
- Edit your asset details. Fields marked with an asterisk are required.
- Click Save.
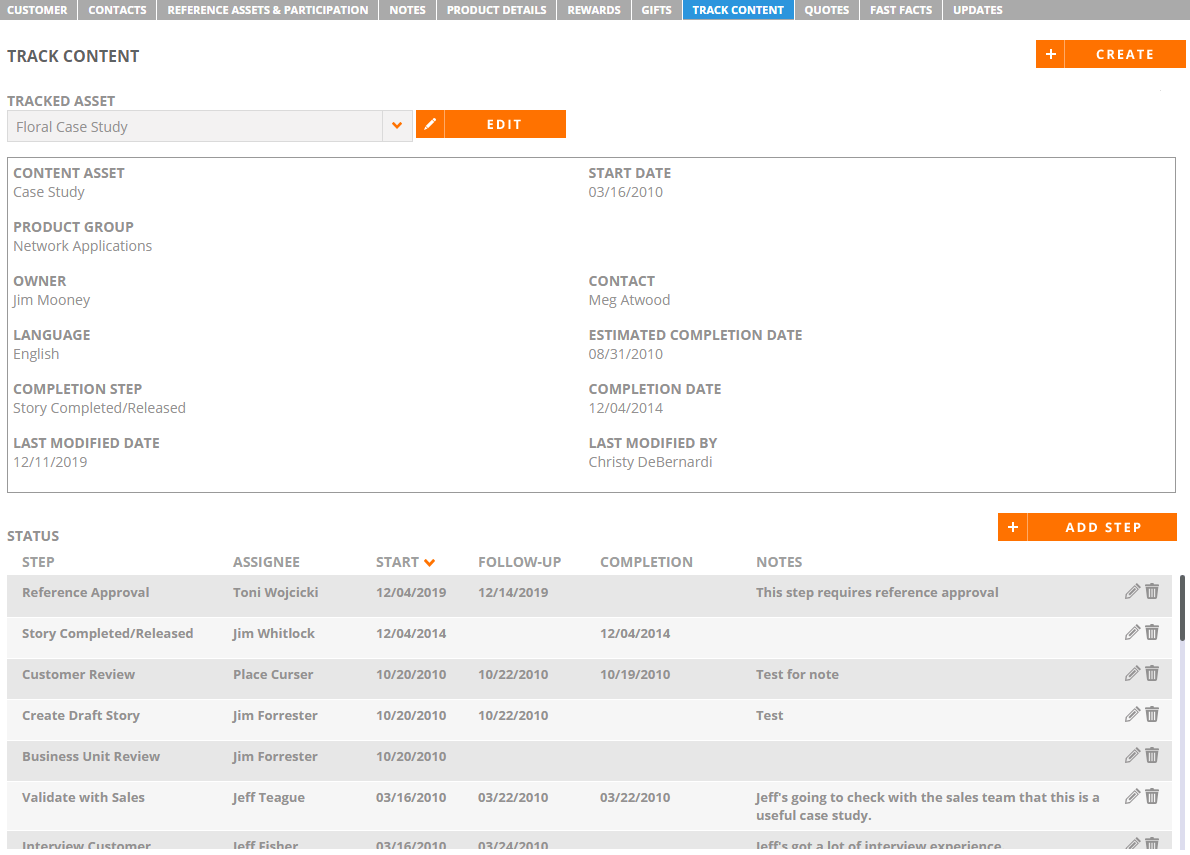
Status
Add and/or edit tracking steps here. This allows you to track the development of a particular asset, such as a video testimonial or case study. Tracking steps created here are known as "Tracking" Task Types.
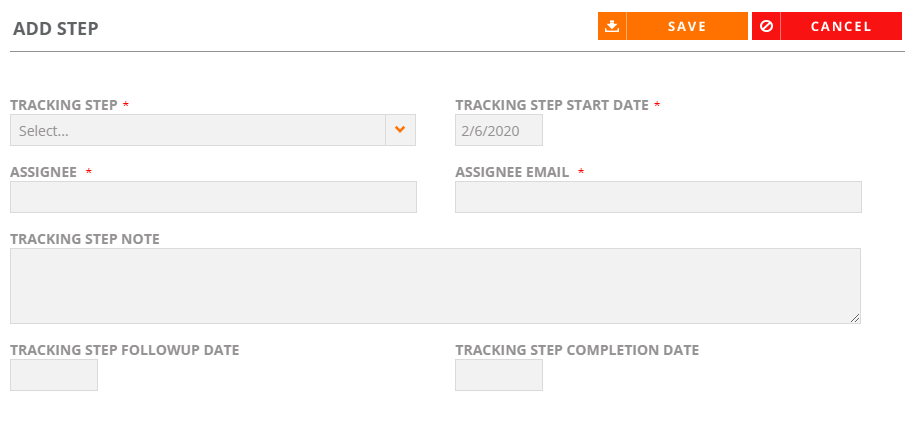
- Click Add Step.
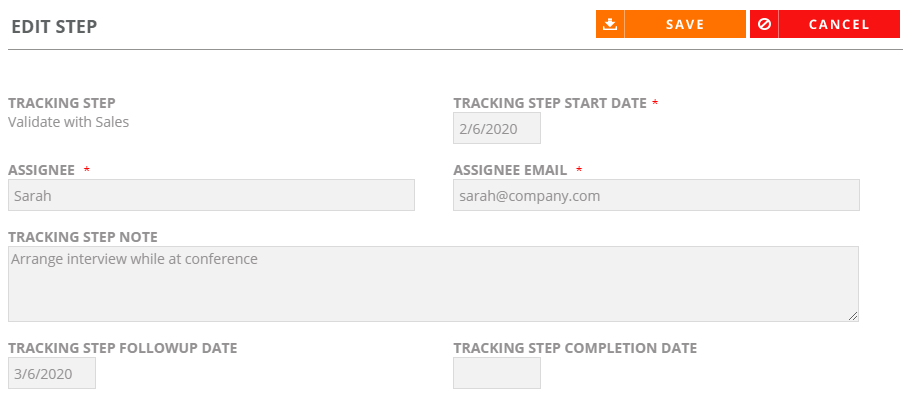
- Add step details. Fields marked with an asterisk are required.
- Tracking Step: Select the tracking step that a particular asset, such as a video testimonial or case study, is at within the customer-defined development process.
- Start Date: Enter the start date of the tracking step.
- Assignee: Assign the tracking step to an individual. If this individual is not a user in the system, their name can be entered manually. Assignees can view and/or complete their track content step within My Tasks.
- Assignee Email: Enter the email of the individual chosen to track this step.
- Note: Enter any notes associated with this tracking step.
- Tracking Step Followup Date: Enter a date to create a "Tracking" Task Type.
- Tracking Step Completion Date: Enter the completion date of the tracking step.
Note: Steps listed in the Tracking Step drop-down menu have not been used yet to track the status of an asset.
Note: A "Tracking" Task Type will not be generated if this step has already been completed (i.e. a Completion Date has been entered).
- Click Save. Your track content step will display for your asset.
- Click the Pencil icon.
- Edit step details. Fields marked with an asterisk are required.
- Click Save.
Note: To delete existing tracking steps, click the Trash icon.
Note: Click the Return to Search button if you are finished with your edits and wish to return to the search results page.